The industrial control system (ICS) used in this scenario simulates an environment that might be used to cool industrial equipment. The ICS is made up of five systems. The first system contains a tank, tank level sensor and a water pump. The second system is a programmable logic controller (PLC) which controls the water pump based on the level of water found in the attached tank. The third system is an Open Platform Communications (OPC) server which accesses and modifies data found on the PLC. The fourth system is running Human Machine Interface (HMI) software which communicates with the OPC server to provide a human system operator with system statistics and control. The final system in the ICS is a security appliance that provides routing and firewall services for all systems.
This scenario also makes use of a system running Kali Linux. In this lab the virtual network switch is configured so that the Kail system receives all data transmitted. (Network diagram)
In this lab you are going to configure the HMI system to provide remote access services. You are then going to use a Kali Linux system to perform a remote network scan on unprotected ICS systems. After the scan you are going to demonstrate how the lack of a firewall can allow a remote hacker to compromise passwords and file system security. You will see that Wireshark can be used to capture and decode unencrypted remote communication sessions. You will then configure a firewall, VPN server and a VPN client and observe that this prevents the attacks carried out in the first part of the lab.
Part 1
Install Systems
In this part of the lab you are going to install and configure the systems needed to complete the lab.
Login a second time to the nlstu-s1.nl.northweststate.edu remote server using your assigned username and password.
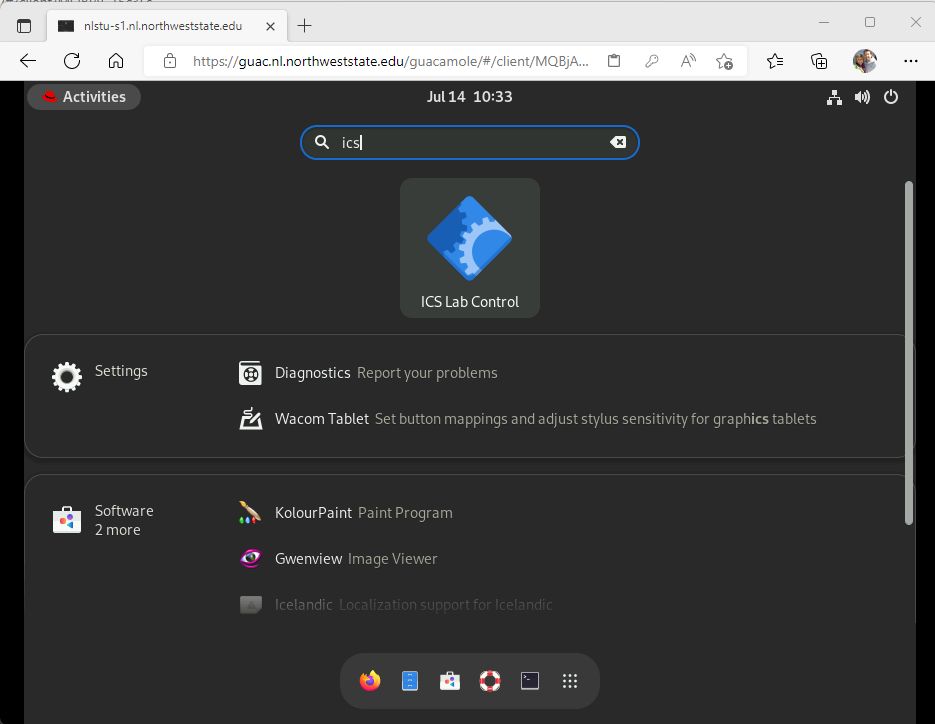
When the Linux desktop appears, click the Activities menu located in the top left hand corner of the screen.
Type ics into the Type to search field that appears in the top center of the screen (Example).
Click the ICS Lab Control icon.
Select the New Lab option, click the OK button then wait for the systems to start.
Part 2
Setup remote access
In this part of the lab you are going to configure the HMI system to support remote access.
Access the HMI system.
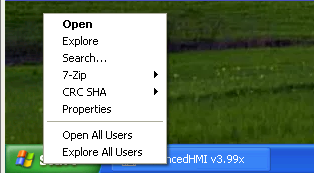
Open File Explorer by right clicking the Start button then choose the Explore option ( Example ).
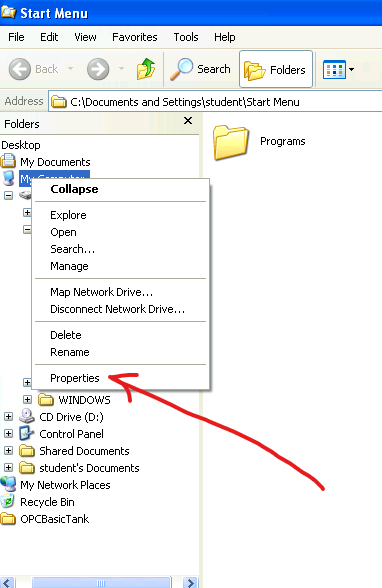
Access System Properties by right clicking My Computer inside the File Explorer program then choosing the Properties option ( Example ).
Click the Remote tab within System Properties.
Select the check box labeled Allow users to connect remotely to this computer.
Click the OK button.
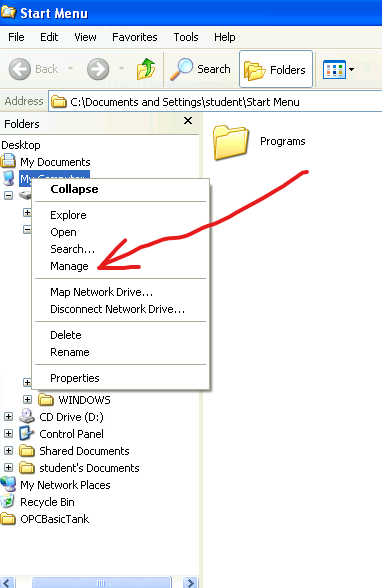
Access the Computer Management program by right clicking My Computer inside the File Explorer program then choosing the Manage option ( Example ).
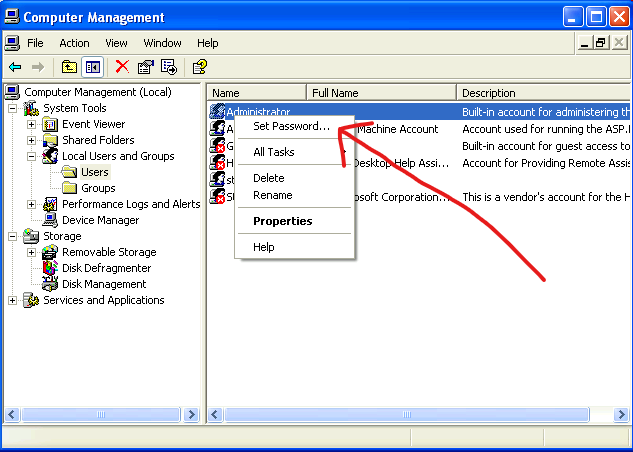
In Computer Management expand the Local Users and Groups category, select the Users folder right click the Administrator user then choose the Set Password... option ( Example ).
Click the Proceed button.
Type the new password batman into both the New password: and the Confirm password: fields.
This is NOT a secure password and is only being used so cracking it later will be less time consuming.
Click the OK button.
Click OK a second time when you are informed that the password has been set.
Close the Computer Management and File Explorer windows.
Part 3
Use the nmap scanner program to remotely probe unprotected systems
In this part of the lab you are going to move the Kali system to a different network segment then the ICS and use the nmap scanner program to probe for running services.
Access the Kali system.
At the login screen enter student into the Enter your username field and Password01 into the Enter your password field.
Click the Log In button.
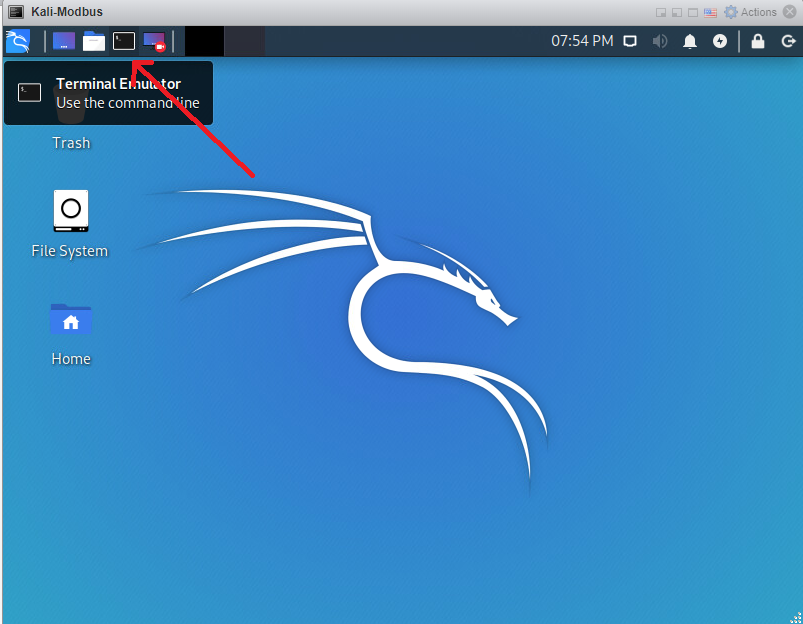
Open a terminal (command prompt) window by clicking the Terminal Emulator button found at the upper left hand corner of the window (Example).
Type the command nmcli connection to view the available network connections.
Notice that the Cell-Area Zone configuration is associated with a device but the Manufacturing Zone configuration is not.
Type the letter q to stop viewing the network configurations.
Switch the zone (network segment) that the Kali system is connected to by typing the command ./change_network.sh then providing the student user's password, Password01 when prompted.
To prevent people from looking over your shoulder and writing down the password it is not displayed on the screen as you are typing.
View the available network configurations by typing the command nmcli connection.
Notice that now the Manufacturing Zone configuration is associated with a device but the Cell-Area Zone configuration is not.
Type the letter q to stop viewing the network configurations.
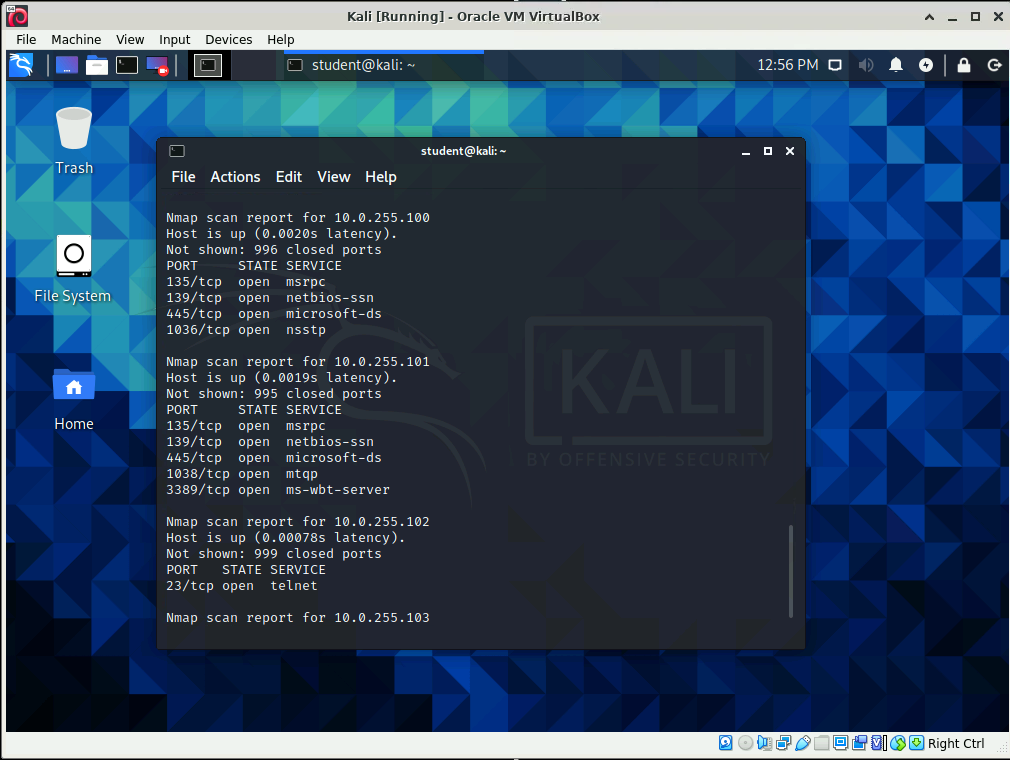
Use the command nmap 10.0.255.0/24 to remotely scan the network segment containing the ICS systems.
When the scan is complete, notice that the HMI system, having the address 10.0.255.101, has the Microsoft RDP port 3389 and the Microsoft SMB file sharing ports 139/445 open.
Take a screen shot showing the entire Kali window, and the open ports on the HMI system (Example) then paste it into the VPN Lab Form found here.
Part 4
Use the ncrack program to crack the administrator password on the unprotected HMI system
In this part of the lab you are going to use ncrack program to crack the administrator password of the HMI system.
Access a terminal window on the Kali system.
Type the command ncrack --connection-limit 1 -f --user administrator -P rockyou.txt rdp://10.0.255.101 to crack the administrator's password on the HMI system ( Example ).
The --connection-limit 1 switch tells the program to only try password at a time.
The -f switch tells the program to quit once a single password has been cracked.
The --user administrator switch tells the program what username to attack.
The -P rockyou.txt switch tells the program the name and location of the password dictionary it should use.
The rdp://10.0.255.101 argument indicates the IP address of the system to attack and that the RDP protocol should be used.
You can press the <ENTER> key while the attack is in progress to view program statistics.
It may take up to 5 minutes for the password to be cracked.
Part 5
Exfiltrate data from an unprotected system
In this part of the lab, you will exfiltrate data from the unprotected HMI system
Access a terminal window on the Kali system.
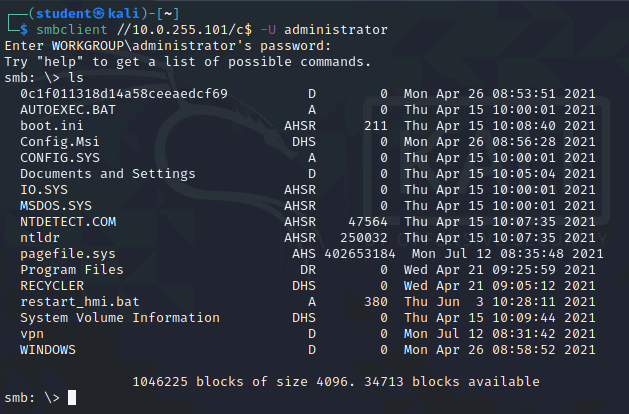
Use the command smbclient //10.0.255.101/c$ -U administrator to start an SMB (file share) connection with the HMI system ( Example ).
When prompted enter the administrator password which you previously cracked using the ncrack program.
Type the command ls to view the files available on the C: drive of the HMI system ( Example ).
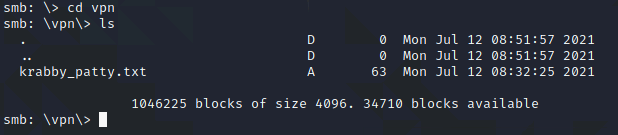
Type the command cd vpn to change your current working directory to the vpn directory.
Type the command ls to view the files located in the vpn directory ( Example ).
Type the command get krabby_patty.txt to copy the file krabby_patty.txt from the HMI system to the Kali system.
Type the command exit to close the SMB session.
Use the command cat krabby_patty.txt to view the secret recipe for a Krabby Patty.
Part 6
Use Wireshark to decode an unencrypted remote session
In this part of the lab, you will use Wireshark's follow stream functionality to demonstrate how an unencrypted remote session can be easily decoded.
Access a terminal window on the Kali system.
Start the Wireshark program by typing the command wireshark
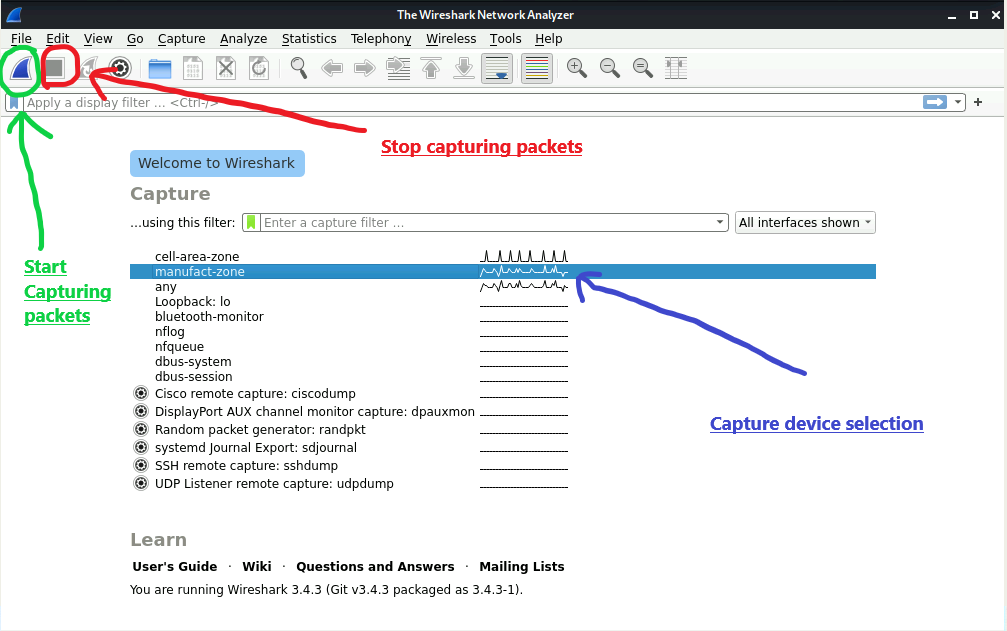
After the Wireshark program starts, select the manufact-zone network device to indicate that you wish to capture data on that device ( Example ).
Click the Start Capturing packets button to begin capturing network data ( Example ).
Open a new terminal (command prompt) window by clicking the Terminal Emulator button found at the upper left hand quadrant of the Kali desktop.
Connect to the PLC by typing the command nc 10.0.255.102 23
The nc command starts the netcat program which is useful network utility that allows a quick connection to network services. In this case netcat is connecting to the telnet service running on the PLC.
Type the command exit to end the terminal session.
Return to the Wireshark window.
Stop capturing network traffic by clicking on the Stop Capturing packets button ( Example ).
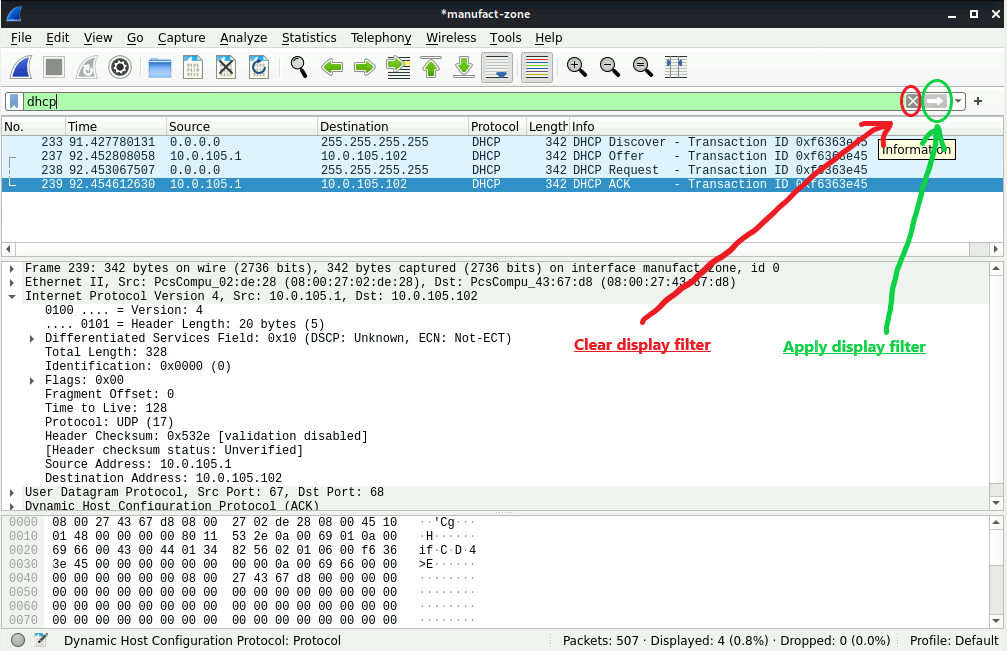
Click in the display filter field, type ip.addr==10.0.255.102 then click the Apply display filter button or press <ENTER> to activate the filter ( Example ).
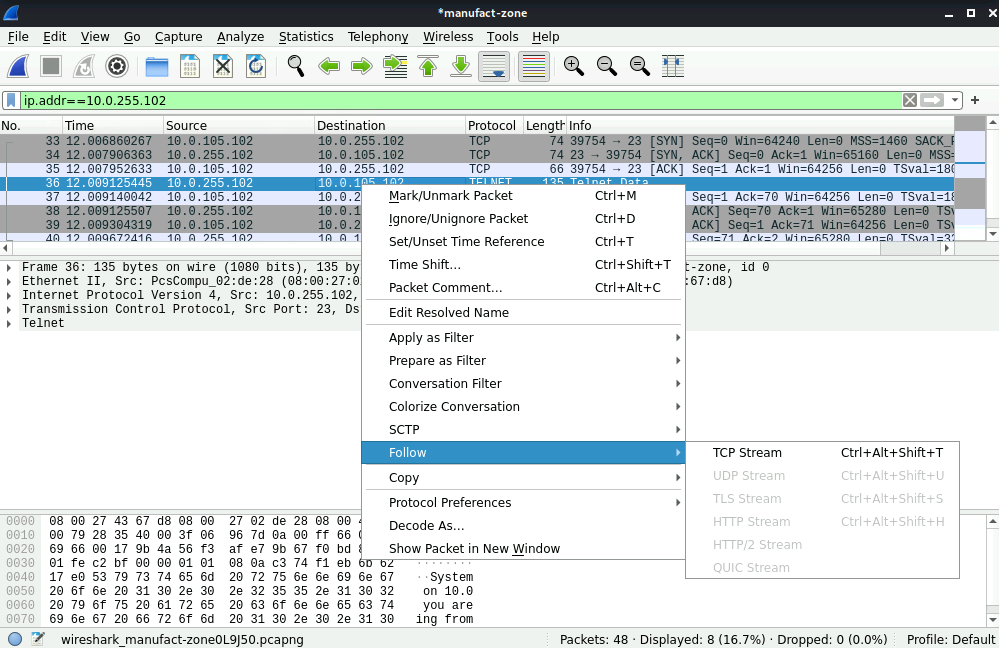
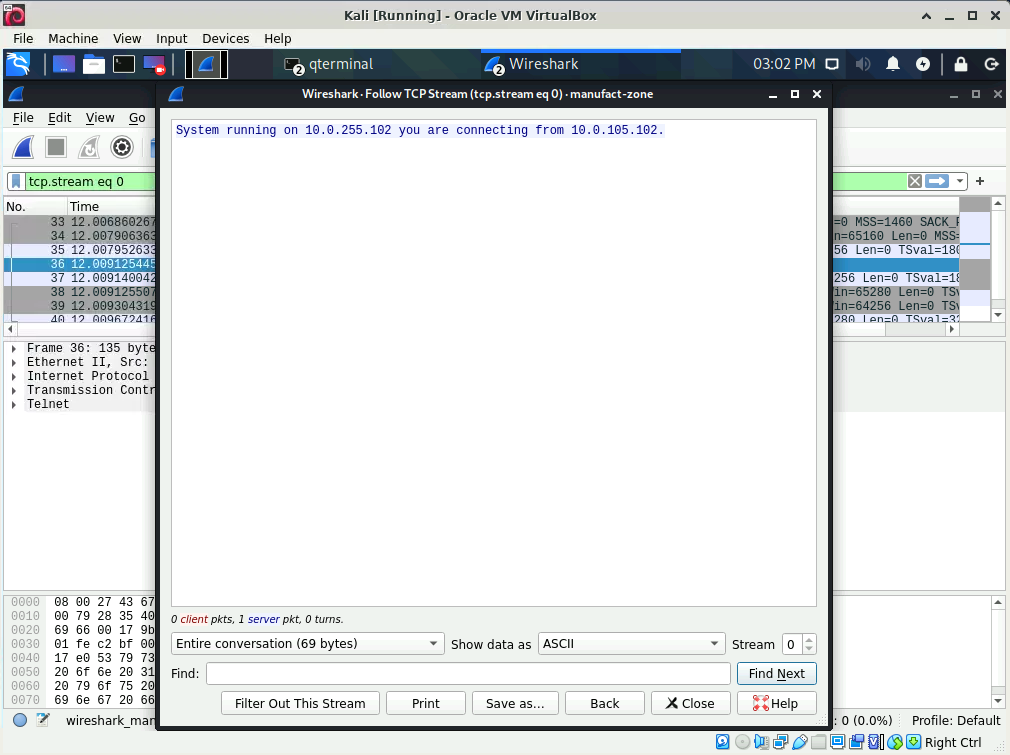
Right click any packet in the packet list pane which is using the TELNET protocol.
From the pop up menu choose the option Follow -> TCP Stream ( Example ).
Close the Wireshark program clicking the Quit without Saving button when prompted.
Part 7
Protect the HMI system with a Firewall and VPN
In this part of the lab, you will turn on the VPN server and Firewall on the Security Appliance.
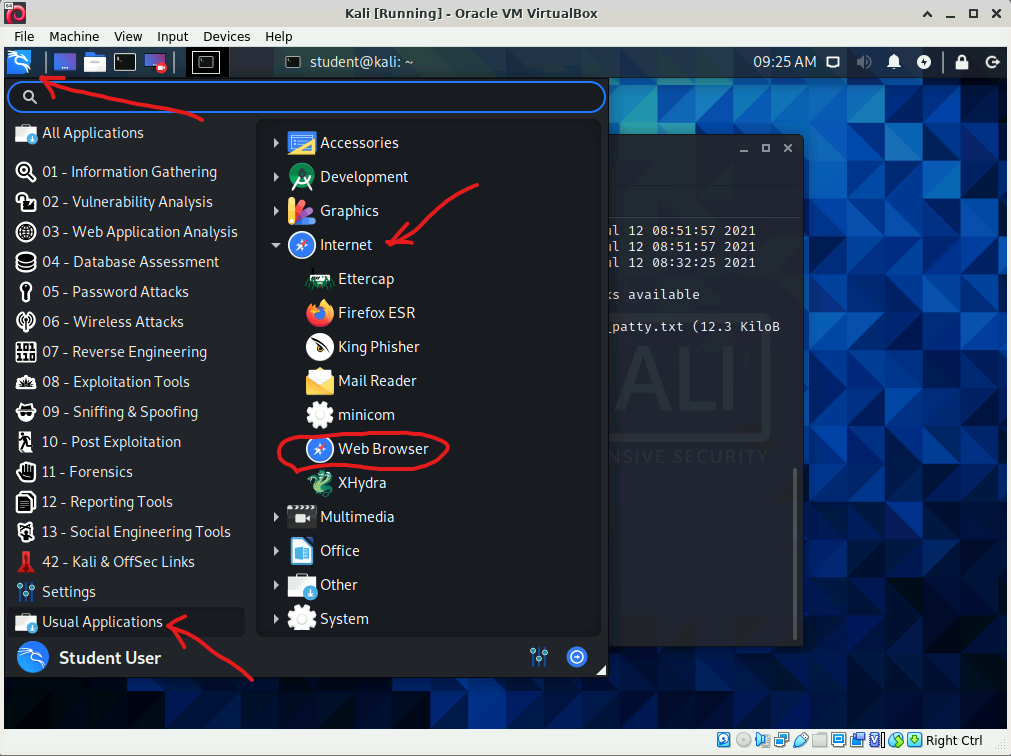
Start a web browser on the Kali system by clicking the Application menu button at the top left of the screen, scrolling down the list of application folders then clicking the Usual Applications folder, expanding the Internet category and finally clicking on the Web Browser option ( Example ).
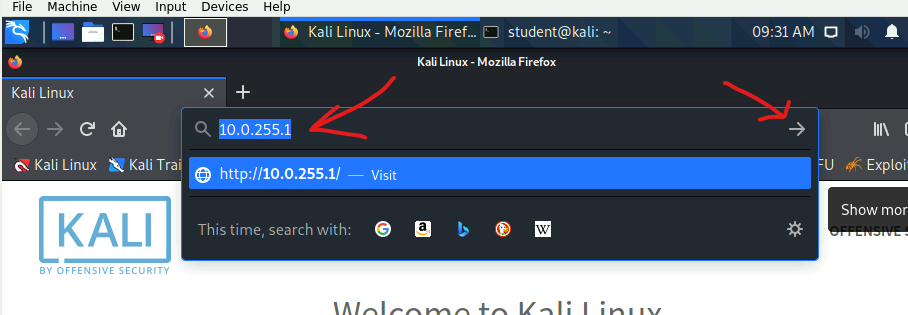
Type the address 10.0.255.1 into the Web Browser's address bar then click the Go to the address in the Location bar button ( Example ).
If necessary, click the Advanced... button when you see the Warning: Potential Security Risk Ahead web page, read the explanation for the security warning then click the Accept the Risk and Continue button.
Type the username admin into the Username field.
Type the password Password01 into the Password field.
Click the SIGN IN button.
If you are asked if you would like Firefox to save the login data, click the Don't Save button.
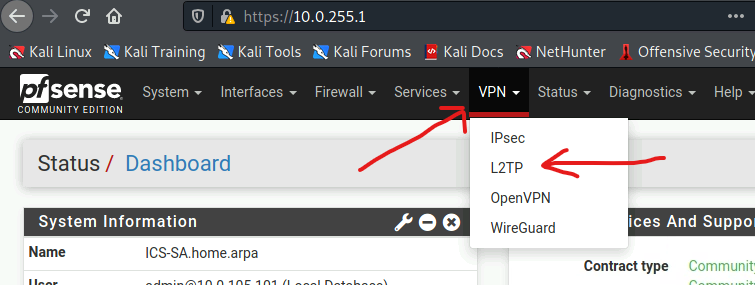
Expand the VPN category at the top of the administrative console page then choose the L2TP option ( Example ).
Start the L2TP VPN server by checking the box labeled Enable L2TP server then scrolling down the page and click the Save button.
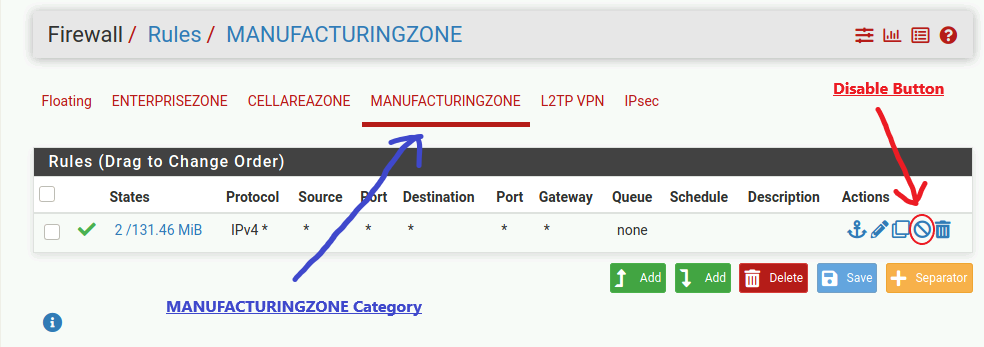
After being informed that the changes were successfully applied, expand the Firewall category at the top of the administrative console page then choose the Rules option.
Select the MANUFACTURINGZONE interface ( Example ).
Click the Disable button associated with the IPv4 rule shown in the MANUFACTURINGZONE interface ( Example ).
Click the Apply Changes button.
Close the Web Browser.
Begin the configuration of the client VPN connection by clicking the network connection icon found directly to the right of the current time at the top of the Kali desktop ( Example ).
Expand the VPN Connections category then click the Add a VPN connection... option ( Example ).
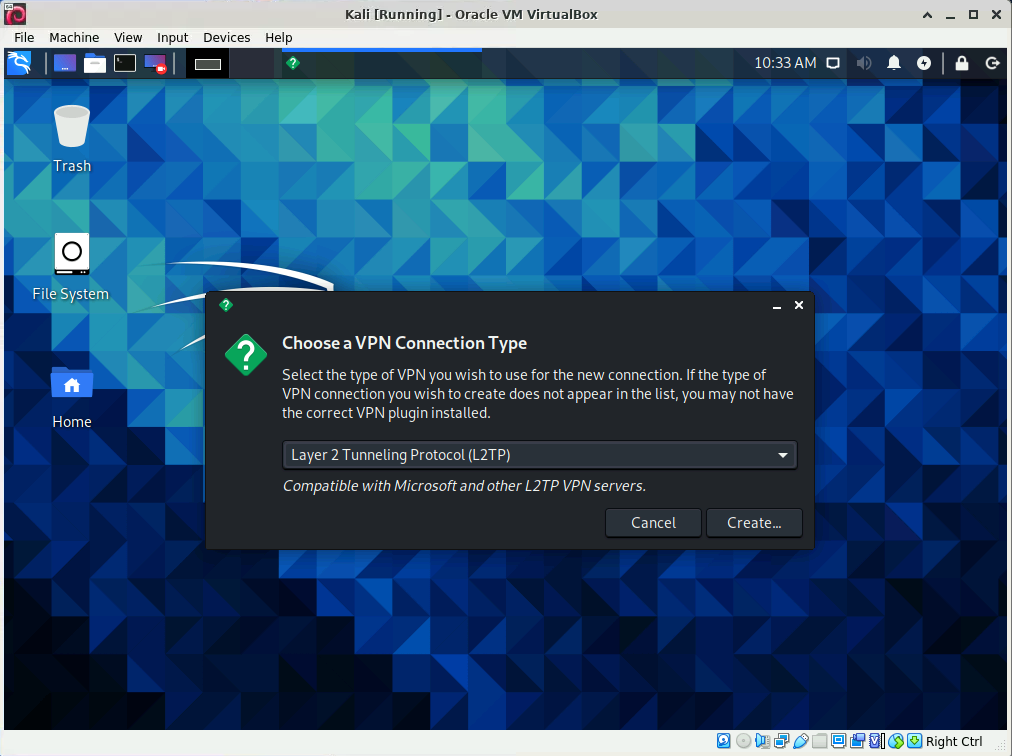
Choose the Layer 2 Tunneling Protocol (L2TP) VPN from the pull down menu ( Example ).
Click the Create... button.
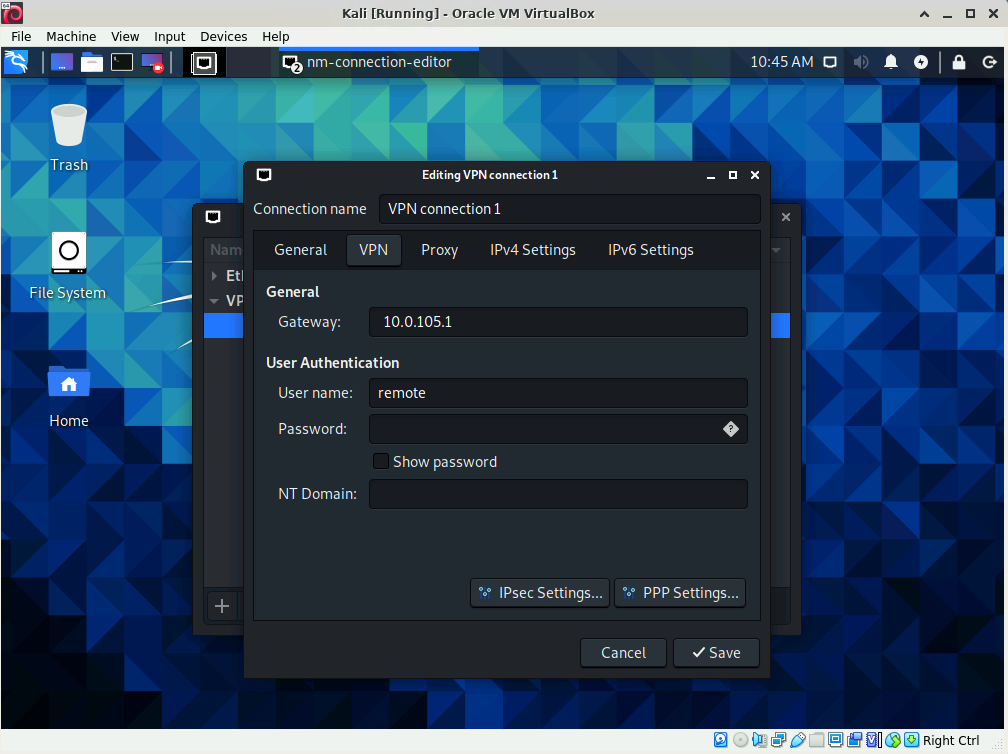
Type the IP address 10.0.105.1 into the Gateway: field ( Example ).
Type the username remote into the User name: field ( Example ).
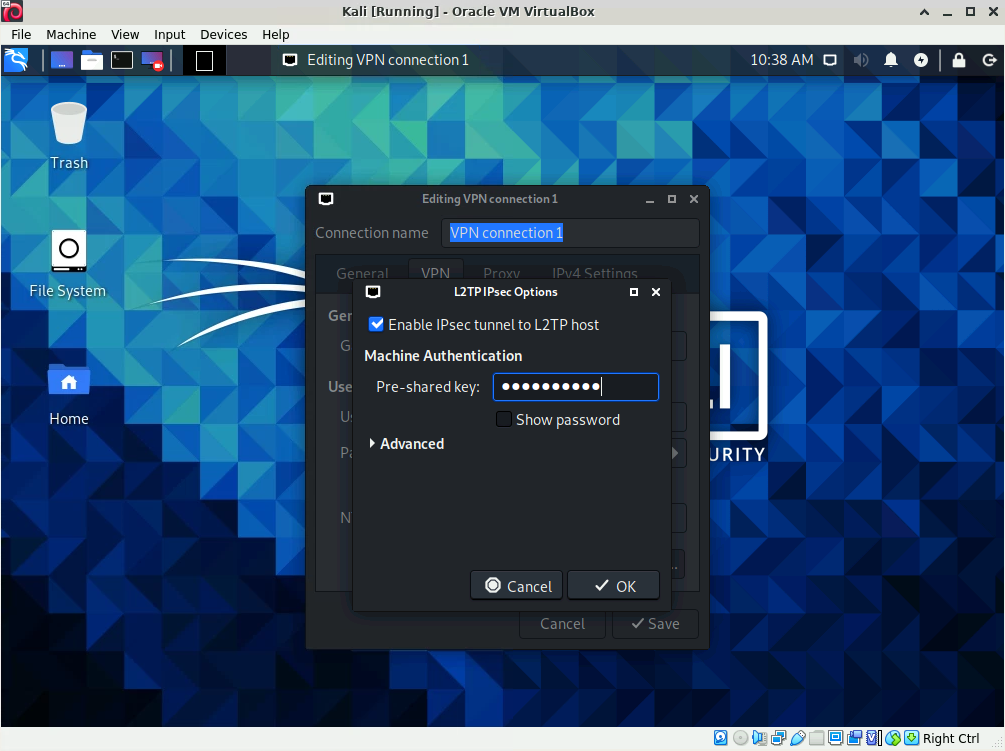
Click the IPSec Settings... button.
Check the box labeled Enable IPSec tunnel to L2TP host ( Example ).
Type Password01 into the Pre-shared key: field ( Example ).
Check the box labeled Show password and verify that the password entered is Password01.
Click the OK button.
Click the Save button.
Part 8
Attempt to exfiltrate data from a system protected by a firewall
In this part of the lab you are going to an exploit systems protected by a firewall.
Access a terminal window on the Kali system.
Use the command nmap 10.0.255.0/24 to remotely scan the network segment containing the ICS systems.
When the command completes, notice that the firewall now blocks the network scan.
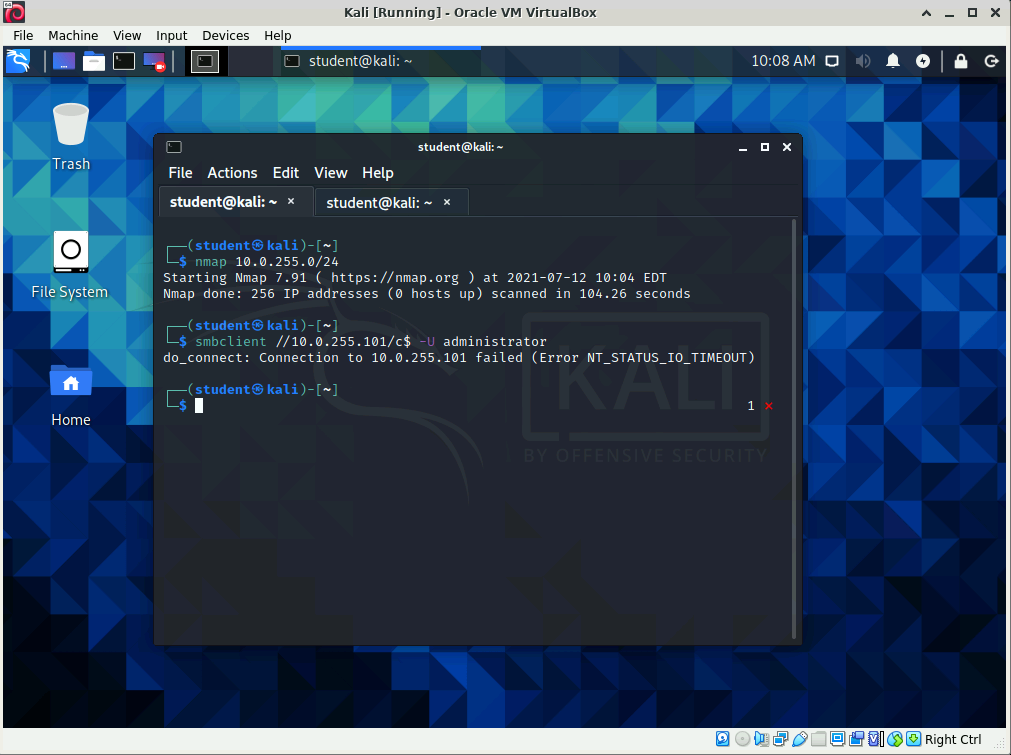
Use the command smbclient //10.0.255.101/c$ -U administrator to attempt and start an SMB (file share) connection with the HMI system.
Take a screen shot showing the entire Kali window and the output from the smbclient command ( Example ) then paste it into the VPN Lab Form found here.
Part 9
Attempt to use Wireshark to decode an encrypted remote session
In this part of the lab, you will use Wireshark's follow stream functionality to demonstrate that an encrypted remote session cannot be easily decoded.
Start the VPN connection by clicking the network connection icon found directly to the right of the current time at the top of the Kali desktop, expanding the VPN Connections category then clicking the VPN connection 1 option.
Type in the password Password01 then click the OK button.
Start the Wireshark program by typing the command wireshark
After the Wireshark program starts select the manufact-zone network device to indicate that you wish to capture data on that device ( Example ).
Click the Start Capturing packets button to begin capturing network data ( Example ).
Open a new terminal (command prompt) window by clicking the Terminal Emulator button found at the upper left hand corner of the window.
Connect to the PLC by typing the command nc 10.0.255.102 23
The nc command starts the netcat program which is useful network utility that allows a quick connection to network services. In this case netcat is connecting to the telnet service running on the PLC.
End the terminal session by typing the command exit
Return to the Wireshark window.
Stop capturing network traffic by clicking on the Stop Capturing packets button ( Example ).
Click in the display filter field, type ip.addr==10.0.255.102 then click the Apply display filter button or press <ENTER> to activate the filter (Example).
Note that no packets are displayed even though the nc program showed that a connection to the PLC was successful.
To end the lab, restart the ICS Lab Control program from the Desktop if necessary, select the Pause/End Lab option, click the OK button then wait for the systems to stop.